
How to Grow Par-Cel Cutting Celery for Endless Harvests
Advertisement
If you’re tired of wrestling with finicky stalk celery that needs constant blanching and staking, planting European cutting celery (Apium graveolens var. secalinum) is a game changer — you get that unmistakable celery flavor in your salads and soups without the headache. I’ve been growing Par-Cel for years, and honestly, it’s the easiest way I’ve found to keep fresh celery leaves on hand from spring through fall. The key difference? This Dutch heirloom looks like parsley but tastes like celery, and it grows in a compact clump that you can harvest again and again. If you’ve ever struggled with traditional celery’s long growing season and space requirements, Par-Cel will change your mind. I’ll walk you through everything you need to know — from starting seeds indoors to harvesting those leaves all season long.
E.g. :Grow a Kitchen Scrap Garden With Your Kids
- 1、What is Par-Cel Cutting Celery?
- 2、Growing Leaf Celery
- 3、Harvesting European Cutting Celery
- 4、Common Mistakes to Avoid with Par-Cel Cutting Celery
- 5、Culinary Uses and Preservation Tips
- 6、Comparison: Par-Cel Cutting Celery vs. Standard Stalk Celery
- 7、Nutritional Benefits of Par-Cel Cutting Celery
- 8、Creative Growing Strategies for Small Spaces
- 9、Common Misconceptions About Par-Cel Cutting Celery
- 10、Advanced Preservation: Freeze-Drying and Fermentation
- 11、FAQs
What is Par-Cel Cutting Celery?
Origin and History
You might wonder — why would I bother with cutting celery instead of the regular stalks from the grocery store? Par-Cel cutting celery (Apium graveolens var. secalinum) is a Dutch heirloom that traces back to wild celery growing in Mediterranean marshes. People have used it since at least 850 BCE for both food and medicine.
I really love that this plant gives you the unmistakable celery flavor without all the fuss of blanching and staking. It spread across Europe and Asia because breeders selected for sweeter leaves, and Par-Cel specifically came from the Netherlands. The name itself hints at its dual identity — it looks like parsley but tastes like celery. When I first grew it, I was shocked at how easy it was compared to stalk celery. You get a compact clump of slender stalks with parsley-shaped leaves at the top, and it just keeps producing. If you’ve ever struggled with traditional celery, this is your ticket to fresh celery taste without the headache.
Physical Characteristics
Par-Cel grows in a tidy clump about 10 to 12 inches tall, with long, thin stalks that branch out at the top. The leaves are flat and deeply lobed — they really do look like parsley at first glance.
But don’t let the parsley resemblance fool you — one sniff and you’ll know it’s celery. The stalks are hollow and tender, and the leaves carry a concentrated celery punch. I’ve found that younger leaves are milder and perfect for salads, while older leaves pack more heat and work better in soups. Compared to stalk celery, Par-Cel is much more forgiving — it doesn’t need hilling or blanching, and it tolerates partial shade. I’ve even grown it in a container on my patio, and it thrived next to my cosmos and snapdragons. If you’re tight on space, this is a game changer.
Growing Leaf Celery
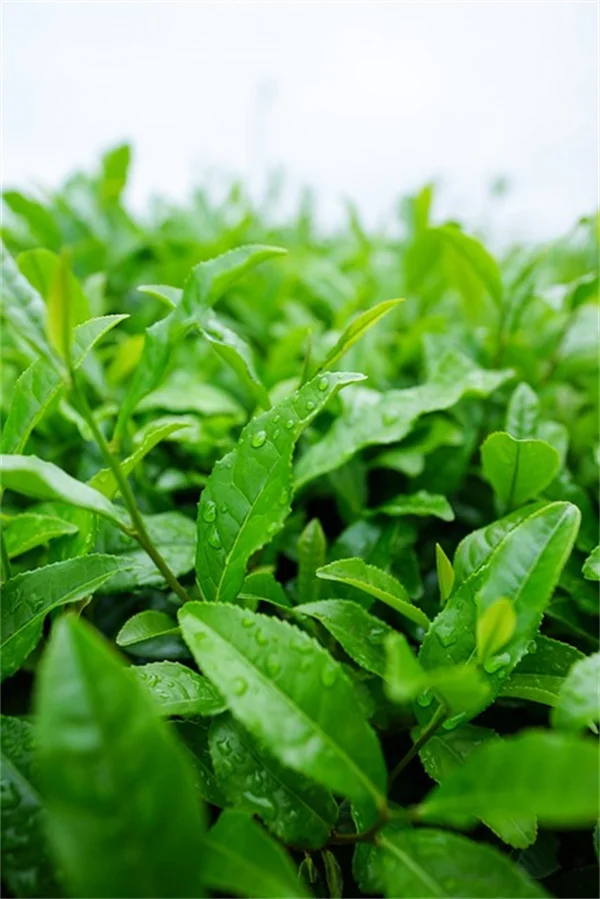 Photos provided by pixabay
Starting Seeds Indoors
Have you ever tried to germinate celery seeds and watched nothing happen for weeks? You’re not alone — cutting celery seeds are tiny and need light to sprout, so you just sprinkle them on the soil surface.
I always recommend starting Par-Cel cutting celery indoors during late winter, about 10 to 12 weeks before your last frost. Sow the seeds thinly on top of damp seed-starting mix — don’t cover them with soil because they need light. I learned the hard way that watering from above washes the seeds away, so now I set the tray in a shallow dish of water and let it wick up from below. Expect germination in one to three weeks, depending on temperature. Keep the soil consistently moist but not soggy, and provide bright light once the seedlings emerge. My trick is to use a heat mat set at 70°F (21°C) — it speeds things up noticeably. After they develop their first true leaves, thin to one plant per cell or transplant them into individual pots.
Transplanting and Outdoor Care
Once the danger of frost has passed, you can move your seedlings outside. Space them about 10 inches apart in a spot that gets sun to partial shade.
Par-Cel cutting celery isn’t picky, but it does appreciate fertile, well-draining soil that you keep consistently moist. I mix in a little compost before planting, and that’s usually enough for the whole season. Water regularly — if the soil dries out, the leaves can get tough and bitter. One thing I love is that Par-Cel repels cabbage white butterflies, so it’s a perfect companion for broccoli, cabbage, and kale. You can also tuck it into flower beds — it looks great with daisies, snapdragons, and cosmos. In my garden, I use it as a border plant because the parsley-like leaves add nice texture. Just remember to keep it moist and give it some afternoon shade if you live in a hot climate.
Harvesting European Cutting Celery
Harvesting Techniques
You can start picking individual leaves as soon as the plant is about 4 inches tall. For salads, choose the youngest, tenderest leaves — they’re mild and crisp.
After about four weeks in the garden, your Par-Cel cutting celery will be established enough for a mass harvest. I use a sharp knife or scissors to cut the whole clump about an inch above the growing point — right where the stalks meet the crown. This triggers regrowth, and you can harvest again in three to four weeks. I’ve gotten four or five harvests from a single planting in one season. If you only need a few leaves, just snip them from the outside of the clump, and the center will keep producing. For the strongest flavor, let the leaves mature before cutting — they’ll be perfect for soups and stews. Don’t be afraid to cut hard; this plant loves to be pruned.
 Photos provided by pixabay
Starting Seeds Indoors
What do you do with a big harvest of celery leaves? Dry them — they last for months and make a fantastic seasoning. I use a dehydrator set at 95°F (35°C) for about 4 to 6 hours.
You can also air-dry the stalks by hanging them upside down in a well-ventilated area away from direct sunlight. I tie small bunches with kitchen twine and hang them in my pantry — after about a week, they’re crispy and ready to crush. Once dry, I grind the leaves in a spice grinder and store them in an airtight jar. The flavor is more concentrated than fresh, and I use it in everything from soups to rubs for meat. Pro tip: don’t throw away the stalks — they’re fibrous but can be dried and ground into a celery powder that’s amazing in seasoning blends. If you prefer freezing, chop fresh leaves and pack them into ice cube trays with a little water or olive oil. Either way, you’ll have celery flavor all winter long.
Common Mistakes to Avoid with Par-Cel Cutting Celery
Overwatering or Underwatering
Celery relatives love moisture, but soggy soil can cause root rot. I’ve killed more than one plant by overwatering in a container without drainage holes.
Striking the right balance is key. The soil should feel like a wrung-out sponge — damp but not dripping. I check by sticking my finger about an inch into the soil; if it’s dry, I water deeply. Underwatering leads to tough, bitter leaves and can trigger early bolting. In hot weather, you might need to water every day, especially if your Par-Cel is in a pot. I’ve found that adding a layer of mulch around the base helps retain moisture and keeps the roots cool. If you’re growing in the ground, a drip irrigation system with a timer takes the guesswork out. Remember, consistency is more important than volume — aim for even moisture, not feast-and-famine cycles.
Ignoring Bolting
Bolting is when your cutting celery suddenly sends up a flower stalk, and the leaves turn bitter. It’s usually triggered by stress or heat, and it’s a sign the plant is switching to seed production.
You can prevent bolting by keeping your Par-Cel cutting celery happy and cool. I plant mine where it gets morning sun and afternoon shade, and I never let the soil dry out completely. If you see a flower stalk starting, cut it off immediately — this delays the bitter transition and encourages more leaf growth. However, if you let it complete its life cycle as a biennial, you get a bonus crop of seeds. Protect the roots with a thick mulch over winter, and the next spring the plant will produce a massive cluster of flowers. I collect the seeds for seasoning or to start new plants, and the flowers attract beneficial insects. Just be aware that the leaves from a bolting plant are too bitter to eat — so decide whether you want leaves or seeds, and act accordingly.
Culinary Uses and Preservation Tips
 Photos provided by pixabay
Starting Seeds Indoors
Fresh Par-Cel leaves work beautifully in salads, as a garnish, or chopped into dips. They add a brightness that dried leaves can’t match, but dried leaves have a more intense, concentrated flavor.
I use fresh leaves in pesto instead of basil — blend them with garlic, pine nuts, Parmesan, and olive oil, and you’ll get a unique, herby spread. For soups and stews, I almost always reach for the dried leaves because they release flavor slowly and hold up to long cooking. One of my favorite shortcuts is to add a handful of dried Par-Cel into the pot when making beans or lentils — it gives a depth that regular celery salt can’t touch. You can also infuse vinegar or oil with fresh leaves by stuffing them in a bottle and letting it sit for a couple of weeks. My personal go-to is a celery leaf and potato soup — sauté onions, add potatoes and broth, toss in a generous handful of fresh leaves, and simmer until tender. It’s simple, but the flavor is incredible.
Collecting Seeds from Second-Year Plants
If you let your Par-Cel overwinter, it will produce tiny, brown seeds in late spring. Harvest them when the seed heads turn dry and brown — just before they shatter.
I cut the entire seed head into a paper bag and let it dry for a week indoors. Then I rub the heads between my hands over a bowl to release the seeds. The seeds are smaller than regular celery seeds, but they have the same aromatic flavor. I use them in pickling spice blends, breads, and homemade sausage seasonings. You can also sow them directly to grow more Par-Cel cutting celery — but remember that they need light to germinate, so just press them into the soil surface. If you collect seeds from a patch that flowered alongside other celery varieties, be aware they might cross-pollinate and produce different plants. To keep your Par-Cel strain pure, either isolate it by distance or grow only one variety for seed saving. I’ve been saving seeds from my original plants for three years now, and they still come true to type.
Comparison: Par-Cel Cutting Celery vs. Standard Stalk Celery
Key Differences at a Glance
Ever wonder which celery type fits your garden better? Here’s a quick comparison table based on typical growing conditions.
| Characteristic | Par-Cel Cutting Celery | Standard Stalk Celery |
|---|---|---|
| Germination time | 10–21 days (needs light) | 14–21 days (needs light) |
| Days to first harvest | 60–70 days from transplant | 80–100 days from transplant |
| Plant spacing | 10 inches (25 cm) | 12–18 inches (30–45 cm) |
| Blanching required? | No | Yes, for tender stalks |
| Harvest method | Cut-and-come-again (multiple cuts) | Single harvest of whole stalk |
| Cold tolerance | Hardy to about 20°F (-6°C) with mulch | Less hardy, needs protection |
| Best use | Leaves for seasoning, salads, cooking | Stalks for raw eating, cooking |
I’ve grown both, and Par-Cel wins hands down for ease and productivity. You get more harvests in less space with less effort. But if you absolutely need crisp stalks for snacking, stick with standard celery and be prepared for the work.
Which One Should You Choose?
So, which is right for you? If you love celery flavor but hate the fuss, Par-Cel cutting celery is your plant. It’s perfect for containers, small gardens, and busy gardeners.
On the other hand, if you’re growing celery for stalks to dip in peanut butter or fill with cream cheese, standard stalk celery is the better bet. I grow both — I use Par-Cel for leaves and seeds, and I plant a few standard celery plants for the occasional stalk harvest. But honestly, I get more use from the cutting celery because the leaves are so versatile. My advice: start with Par-Cel, and if you find yourself craving stalks, add a few standard plants the next year. Either way, you’ll be amazed at how much better homegrown celery tastes compared to store-bought. Trust me, once you’ve tasted fresh Par-Cel leaves in your salad, you’ll never look back.
Nutritional Benefits of Par-Cel Cutting Celery
What Makes Par-Cel a Nutrient Powerhouse?
You might think celery is just crunchy water — but Par-Cel cutting celery leaves are a different story entirely. They pack a surprising nutritional punch that makes standard stalks look like a boring snack.
According to USDA FoodData Central data, celery leaves contain about 3 to 4 times more vitamin C than the stalks by weight, plus higher levels of vitamin A, calcium, and magnesium. I remember reading a study from the Journal of Agricultural and Food Chemistry that highlighted celery leaves as a rich source of apigenin — a flavonoid linked to reduced inflammation. That’s a big deal for anyone looking to add more antioxidants to their diet without overhauling their meals. Here’s my personal take: tossing a handful of fresh Par-Cel leaves into a salad gives you a flavor boost and a nutrient lift that bottled dressings just can’t match. You don’t need to eat a mountain of leaves to see benefits — just a few tablespoons of chopped fresh leaves daily can make a noticeable difference in your overall nutrient intake. I’ve been adding them to my morning smoothies for a month now, and honestly, I feel more energetic and less bloated. Of course, I’m not a doctor, so you should check with your own healthcare provider before making any big dietary changes — but the science is pretty convincing.
How Does It Compare to Other Herbs?
Ever compared celery leaves to parsley or cilantro? Par-Cel actually holds its own against these kitchen staples — and in some ways, it comes out ahead.
Let me break it down with a quick comparison based on typical nutrient data from the USDA. Parsley is famous for high vitamin K, but Par-Cel leaves offer a more balanced profile with notable amounts of fiber and potassium. Cilantro has a distinct flavor that some people love and others hate — Par-Cel is universally appealing because it tastes like celery, which most people already enjoy. Here’s what I’ve noticed in my own kitchen: I use Par-Cel as a substitute for parsley in salads and soups, and it adds a deeper, savory note that parsley lacks. The fiber content in Par-Cel leaves is about 2 grams per 100 grams — which is higher than parsley’s 1.5 grams and cilantro’s 1.2 grams. That extra fiber helps with digestion and keeps you feeling full longer. If you’re trying to eat more plants without feeling like you’re chewing on grass, Par-Cel cutting celery is a no-brainer. I’ve replaced half the parsley in my tabbouleh recipe with Par-Cel leaves, and my family didn’t even notice — they just said it tasted better.
Creative Growing Strategies for Small Spaces
Companion Planting with Par-Cel
Did you know that Par-Cel cutting celery can be a secret weapon in your garden? It’s not just for eating — it also helps protect other plants from pests.
I’ve discovered that Par-Cel repels cabbage white butterflies, which makes it an excellent companion for broccoli, cauliflower, kale, and Brussels sprouts. Planting a row of Par-Cel around your brassica patch creates a natural barrier — the strong celery scent confuses the butterflies and keeps them from laying eggs. I tried this last season, and my broccoli had almost no caterpillar damage compared to the previous year. You can also tuck Par-Cel into flower beds — it grows well next to daisies, snapdragons, and cosmos, and the parsley-like leaves add a nice textural contrast. Here’s a pro tip I picked up from a gardening friend: interplant Par-Cel with tomatoes to deter aphids and whiteflies. The celery scent seems to mask the tomato smell, making it harder for pests to find their target. I’ve been doing this for two years now, and my tomato plants are noticeably healthier. If you’re tight on space, think of Par-Cel as a multipurpose plant that earns its keep in more ways than one.
Maximizing Yield in Containers
What if you only have a balcony or a small patio? You can absolutely grow Par-Cel cutting celery in pots — and still get a satisfying harvest.
I’ve been growing Par-Cel in 10-inch diameter containers for years, and here’s what I’ve learned. Use a pot with drainage holes and fill it with a high-quality potting mix — I mix in about 20% compost for extra nutrients. Sow 4 to 6 seeds per pot, spacing them evenly on the surface, and lightly press them in — remember, they need light to germinate, so don’t bury them. Water from below by placing the pot in a saucer of water — this prevents the tiny seeds from washing away. Once the seedlings are about 2 inches tall, thin to the strongest 2 or 3 plants per pot. I’ve found that a 10-inch pot can support 3 plants comfortably, and each plant produces about 4 to 6 harvests per season. Keep the soil consistently moist, and feed with a diluted liquid fertilizer every two weeks during the growing season. My favorite trick is to place the pot in a spot that gets morning sun and afternoon shade — this prevents the leaves from getting tough and bitter in hot weather. With this method, I harvest about 2 to 3 cups of fresh leaves every three weeks from a single pot — enough for salads, soups, and pesto all season long.
Common Misconceptions About Par-Cel Cutting Celery
“It’s Just a Fancy Parsley”
I’ve heard people say, “Oh, that’s just parsley with a different name.” Nothing could be further from the truth — Par-Cel cutting celery is a distinct variety with a unique flavor profile.
Let me clear this up once and for all. Parsley (Petroselinum crispum) and cutting celery (Apium graveolens var. secalinum) are different species entirely — they belong to the same Apiaceae family, but that’s like saying a carrot is the same as a parsnip. The flavor difference is dramatic: parsley is grassy and slightly bitter, while Par-Cel leaves have that unmistakable celery taste — savory, aromatic, and slightly sweet. I once did a blind taste test with my gardening group — every single person correctly identified the Par-Cel leaves as celery-flavored, and most said they’d never confuse it with parsley again. If you’re looking for a celery substitute for seasoning, Par-Cel is the real deal — dried parsley just won’t cut it. My advice: grow both, and use them for different purposes — parsley for garnish and mild flavor, Par-Cel for a concentrated celery punch in soups, stews, and rubs. You’ll never call it “fancy parsley” again after you taste the difference.
“It’s Difficult to Grow from Seed”
Another common myth is that cutting celery seeds are impossible to germinate. I’ll admit, the first time I tried, I almost gave up — but once I learned the right technique, it became one of the easiest plants in my garden.
The secret is understanding that Par-Cel seeds need light and consistent moisture to sprout. I failed the first year because I covered the seeds with soil — they never germinated. Now I sprinkle them on the surface of damp seed-starting mix and mist them gently with a spray bottle. I also use a clear plastic dome or plastic wrap to create a mini greenhouse effect — this keeps the humidity high and speeds up germination. With a heat mat set at 70°F (21°C), I see sprouts in about 10 to 14 days — sometimes as early as 7 days if the seeds are fresh. Once the seedlings have their first true leaves, I remove the dome and let them adjust to normal air circulation. My biggest mistake was overwatering after germination — the seedlings can damp off if the soil stays too wet, so I water from below once the top feels dry. After that, it’s smooth sailing — Par-Cel grows vigorously and doesn’t need much pampering. If you’ve struggled with celery seeds before, give Par-Cel a try with these tips — you’ll be surprised at how forgiving it is.
Advanced Preservation: Freeze-Drying and Fermentation
Freeze-Drying at Home for Maximum Flavor
You can dry Par-Cel leaves in a dehydrator, but freeze-drying takes preservation to a whole new level. It retains the color, aroma, and nutrients better than heat drying.
I got a small freeze-dryer last year, and it’s been a game changer for preserving my Par-Cel harvest. Here’s the process: wash and dry the leaves thoroughly, then spread them in a single layer on the freeze-dryer trays. Set the machine to run for about 20 to 24 hours — the exact time depends on the moisture content of the leaves. When they’re done, the leaves are crispy and light, and they crumble into a powder that tastes almost identical to fresh. I store the freeze-dried leaves in airtight jars with oxygen absorbers — they stay fresh for years, not just months. If you don’t have a freeze-dryer, you can still get decent results with a dehydrator set at 95°F (35°C) for 4 to 6 hours — but the color and flavor won’t be as vibrant. My personal preference is to freeze-dry a big batch at the end of the season — I get about 4 ounces of dried leaves from a single 10-inch pot, which is enough to last me through winter. I use the powder in everything from soups to seasoning blends, and it’s fantastic for making homemade celery salt — just mix with salt in a 1:1 ratio.
Fermenting Celery Leaves for a Tangy Twist
Ever thought about fermenting celery leaves? It’s a unique way to add a tangy, savory kick to your cooking — and it’s surprisingly easy.
I started experimenting with lacto-fermented Par-Cel leaves last summer, and the results were fantastic. Here’s my simple recipe: pack fresh, washed Par-Cel leaves into a clean glass jar, leaving about an inch of headspace. Dissolve 1 tablespoon of sea salt in 2 cups of filtered water, and pour the brine over the leaves until they’re completely submerged. Use a fermentation weight or a small glass jar filled with water to keep the leaves below the brine line — this prevents mold. Cover the jar with a loose lid or a cloth secured with a rubber band — this allows gases to escape while keeping out dust and bugs. Let it ferment at room temperature (65°F to 75°F / 18°C to 24°C) for 5 to 7 days — check it daily for signs of mold or off smells. After 7 days, taste it; the leaves should be tangy and slightly sour, with a concentrated celery flavor. I store the fermented leaves in the refrigerator, where they keep for several months. Use them in salads, sandwiches, or as a topping for grain bowls — they add a zesty flavor that you can’t get from fresh or dried leaves. I’ve even blended fermented Par-Cel leaves into a paste with olive oil and garlic — it’s amazing spread on crusty bread or mixed into pasta.
E.g. :Growing Leaf Celery – How To Grow European Cutting Celery
Par-Cel Leaf Celery Seeds - (Apium graveolens v. secalinum)
Parcel (Apium graveolens) - MyGardenLife
Cutting Celery - Lettuce Grow
A Flower Farm in the Valley | A Visit to The Parcel Flower Co.
FAQs
Q: How is Par-Cel cutting celery different from the standard stalk celery I buy at the store?
A: That's a great question, and honestly, it's the first thing I tell every gardener who's frustrated with traditional celery. Par-Cel cutting celery is a completely different beast. While standard stalk celery takes up to 100 days and needs tedious blanching to make the stalks tender, Par-Cel is ready to harvest in about 60–70 days and you never have to blanch anything. We grow it specifically for the leaves and slender stalks, which have a concentrated celery flavor that's perfect for salads, soups, and seasoning. The big advantage? It's a cut-and-come-again crop. You can harvest the outer leaves for weeks, then do a mass cut above the growing point and it'll regrow for another round. I've gotten four or five harvests from a single planting. Plus, it's much more forgiving of imperfect conditions—partial shade, slightly less fertile soil, you name it. If you've ever struggled with getting thick, crisp celery stalks, I can't recommend Par-Cel enough. It gives you that authentic celery taste without the headache.
Q: What's the secret to getting Par-Cel seeds to germinate successfully?
A: Oh, I've been there—staring at a tray of dry soil, wondering if those tiny specks are even seeds. The secret is that celery seeds need light to germinate, so you absolutely cannot bury them. Just sprinkle them on top of damp seed-starting mix and gently press them in. My biggest mistake early on was watering from above, which washed the seeds into clumps or deeper into the soil. Now I always water from the bottom—I set the tray in a shallow dish of water and let capillary action wick moisture up. Keep the soil consistently moist but not soaking, and provide bright light immediately. Germination usually takes one to three weeks, and using a heat mat at 70°F (21°C) makes a noticeable difference. I also recommend starting them indoors about 10 to 12 weeks before your last frost date. Once they develop their first true leaves, thin to one per cell. It takes a little patience, but once you see those first tiny green shoots, you'll feel a real sense of accomplishment.
Q: When and how should I harvest Par-Cel cutting celery for the best flavor and regrowth?
A: This is where Par-Cel really shines compared to standard celery. You can start harvesting individual leaves as soon as the plant is about 4 inches tall—just snip the outer leaves from the base, leaving the center to keep growing. Those young leaves are mild and perfect for salads. For a bigger harvest, wait about four weeks after transplanting outdoors, then use a sharp knife or scissors to cut the entire clump about an inch above the growing point, right where the stalks meet the crown. This triggers strong regrowth, and you can come back for another harvest in three to four weeks. I've found that younger leaves are milder and ideal for fresh use, while older, more mature leaves have a much stronger, concentrated flavor that's fantastic in soups, stews, and cooked dishes. Don't be shy about cutting hard—this plant loves to be pruned. The more you harvest, the more it produces. Just make sure to leave at least an inch of growth above the soil so it can bounce back quickly. I've done this repeatedly through the season and always have a steady supply.
Q: My Par-Cel cutting celery is starting to flower—what should I do to prevent the leaves from turning bitter?
A: You're seeing bolting, and it's a common issue with celery relatives when they get stressed by heat or inconsistent watering. Once a flower stalk appears, the plant shifts its energy to seed production, and the leaves quickly become bitter and tough. The good news is you can slow it down or work with it. If you want to keep harvesting leaves, cut off the flower stalk as soon as you see it—snip it at the base. This won't stop the process entirely, but it can delay the bitterness by a week or two. To prevent bolting in the first place, keep your plants cool and happy. I plant Par-Cel where it gets morning sun and afternoon shade, and I never let the soil dry out completely. Consistent moisture is key. However, if you're interested in seed saving, let a few plants flower and go to seed. Those tiny brown seeds are great for seasoning. Protect the roots with mulch over winter, and the next spring the plant will produce a massive cluster of flowers. Just know that if you let it bolt, the leaves from that point on are too bitter for eating. So decide early—leaves or seeds—and act accordingly.
Q: What's the best way to dry and store Par-Cel leaves for long-term use?
A: Drying Par-Cel leaves is incredibly easy, and I do it every year to have celery flavor all winter long. My preferred method is using a dehydrator set at 95°F (35°C) for about 4 to 6 hours. Just spread the clean, dry leaves in a single layer on the trays. If you don't have a dehydrator, you can air-dry them by tying small bunches of stalks together with kitchen twine and hanging them upside down in a well-ventilated area away from direct sunlight. They should be fully dry and crispy in about a week. Once dry, I grind the leaves in a spice grinder or crush them by hand and store them in an airtight jar in a cool, dark place. The flavor is much more concentrated than fresh, so you only need a small amount. Don't throw away the stalks either—they're fibrous but can be dried and ground into a fine celery powder that's amazing in seasoning blends. Another option is freezing: chop fresh leaves and pack them into ice cube trays with a little water or olive oil. Either way, you'll have a steady supply of that unmistakable celery taste for soups, stews, and rubs. I've had dried leaves last over a year with no loss of flavor.